Time Entries
The Time Entries page is where you view, create, and manage all of your tracked time. It supports two view modes and a range of filters to help you find exactly what you need.
Toggle between two views using the controls at the top of the page:
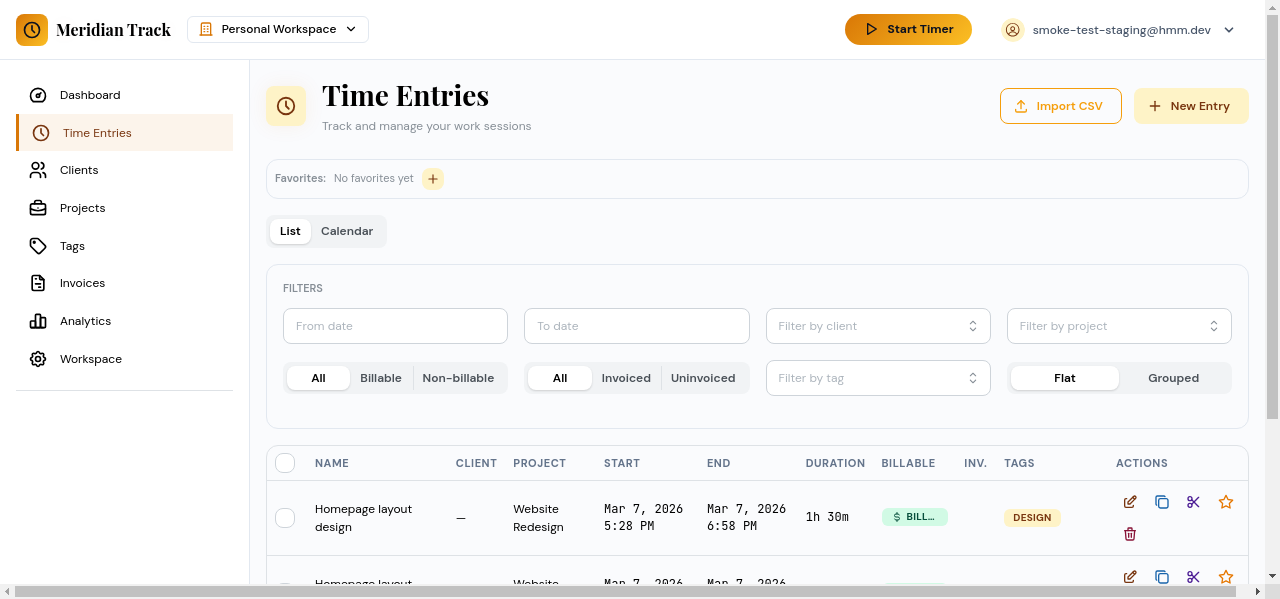
List View
Section titled “List View”Displays time entries in a table sorted by date. Each row shows the task name, project, client, duration, billable status, and tags.
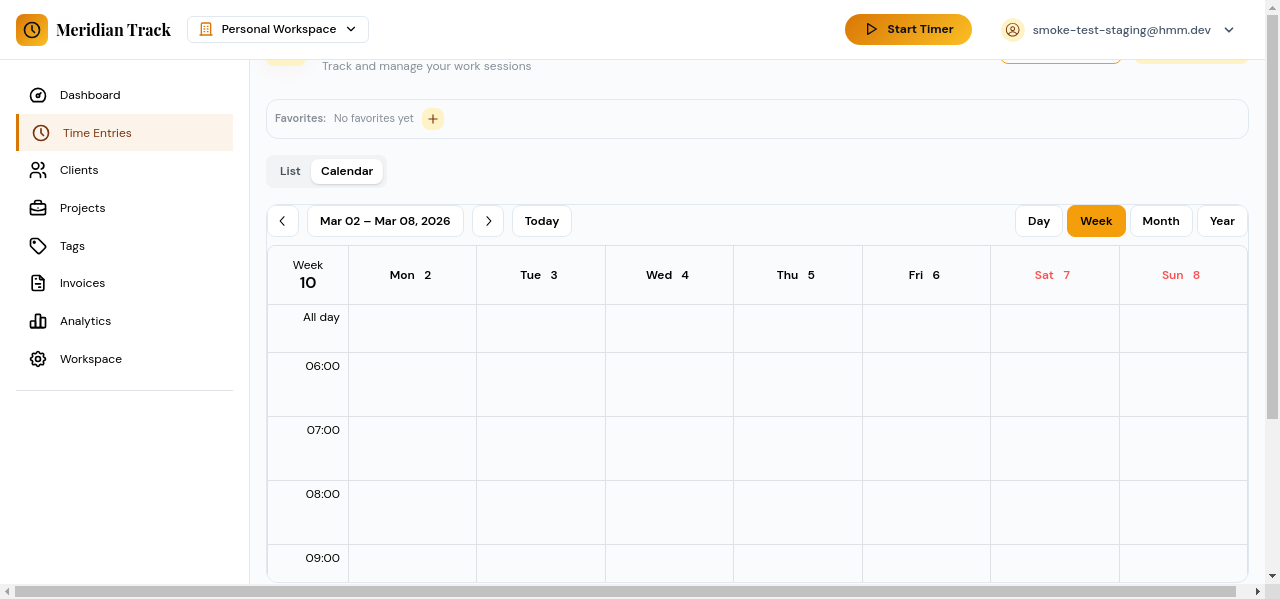
Calendar View
Section titled “Calendar View”Displays time entries on a calendar grid. Entries appear as blocks on the day they were logged, giving you a visual overview of how your time was distributed across the week or month.
Filtering
Section titled “Filtering”Use the filter controls to narrow down displayed entries:
- Date range — Select a start and end date, or use presets like “This Week” or “Last Month.”
- Client — Filter to entries associated with a specific client.
- Project — Filter to entries within a specific project.
- Billable status — Show only billable entries, only non-billable entries, or all.
Filters apply to both list and calendar views.
Creating a Time Entry
Section titled “Creating a Time Entry”Click the “Add Entry” button to open the create modal.
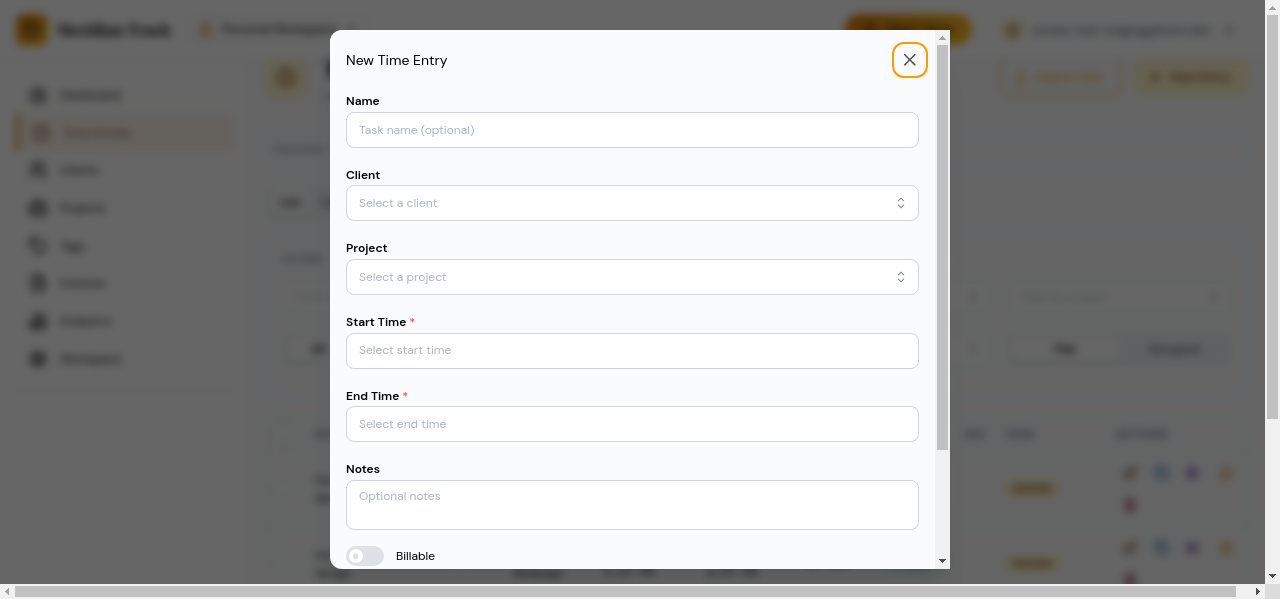
The form includes the following fields:
- Task name — A short description of the work performed.
- Project — Select an existing project (optional).
- Client — Automatically populated when a project with a linked client is selected, or choose one directly.
- Tags — Attach one or more tags for categorization.
- Start time and End time — Set the date and time for the entry. Duration is calculated automatically.
- Billable — Toggle whether this entry counts as billable time.
- Notes — Free-text field for additional details.
Click “Save” to create the entry.
Editing an Entry
Section titled “Editing an Entry”Click any time entry in the list or calendar to open it in the edit modal. All fields from the create form are available for modification. Save your changes or discard them by closing the modal.
Deleting an Entry
Section titled “Deleting an Entry”Open an entry for editing, then click the delete button. A confirmation dialog will appear before the entry is permanently removed.
Bulk Selection and Actions
Section titled “Bulk Selection and Actions”In list view, use the checkboxes to select multiple entries at once. With entries selected, a toolbar appears offering bulk actions:
- Delete — Remove all selected entries after confirmation.
- Edit fields — Apply changes (such as updating the project or toggling billable status) to all selected entries at once.
This is useful for cleaning up or reclassifying large batches of entries.